First angle and third angle projection are the types of Orthographic projection systems to draw engineering drawings. The 1st angle projection system is popular in European countries, whereas 3rd angle projection is popular in North America and Asian countries.
What is Orthographic Projection System?
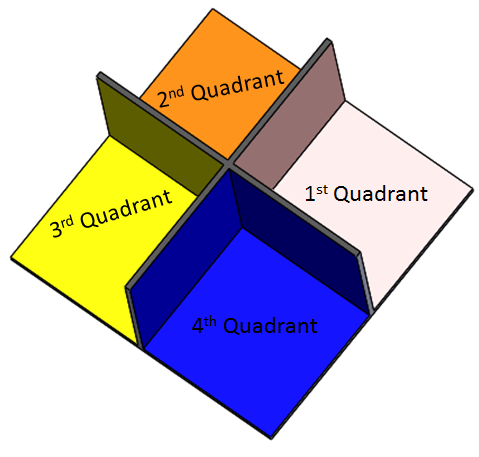
To represent a 3D object in a 2D plane orthographic projection system is used. Orthographic projection systems utilize parallel lines, to project 3D object views onto a 2D plane. We can place objects in the first or third quadrants in an orthographic projection system. We can not use the second and fourth quadrants because of their limitations.
Rule of Orthographic Projection
According to the rule of orthographic projection:
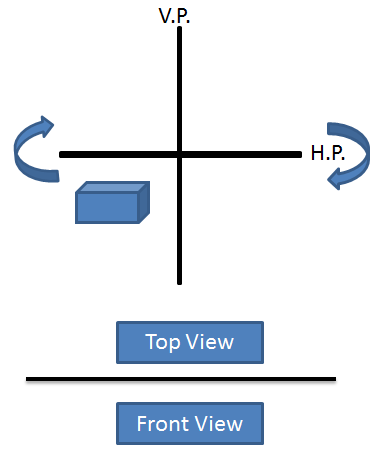
The horizontal plane is rotated in the clockwise direction to draw the projection view of a 3D object on a 2D Plane. We will implement this rule to draw engineering drawings in 1st angle and 3rd angle projection systems.
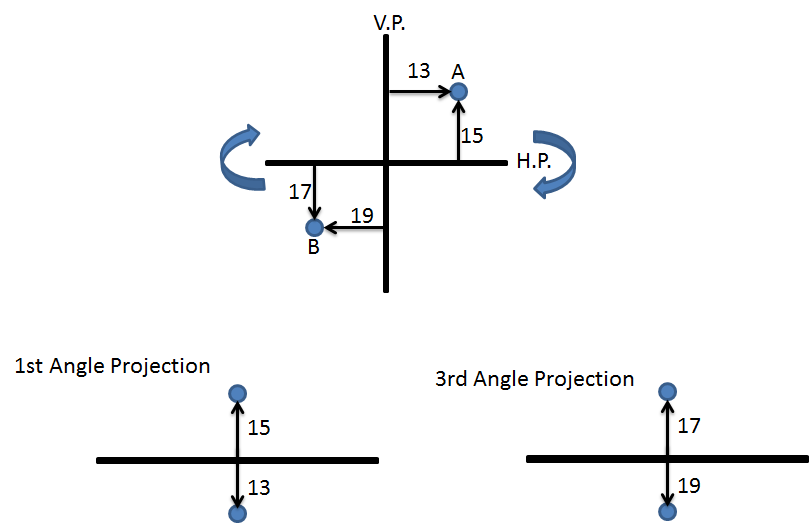
1st angle projection is a type of orthogonal projection system where we place the object in the first quadrant in a way it lies in between the observer and the plane of projection. The first angle projection system is popular in European countries.
Drawing Front and Top View in First Angle Projection
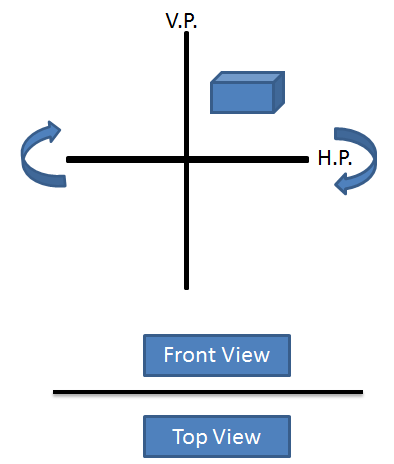
We project object front and top views on vertical and horizontal planes to draw front and top-view.
According to the rule of projection:
We rotate the horizontal plane in the clockwise direction. Horizontal plane rotation brings the top view to the bottom of the projected front view.
Drawing Right and Left Side View in 1st angle projection
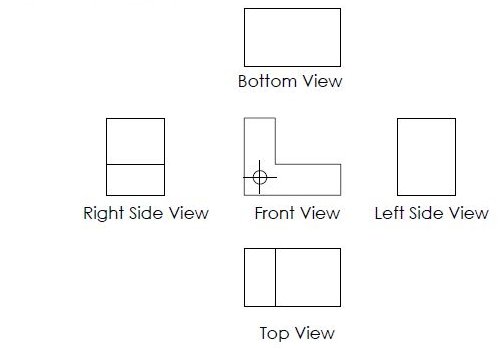
To draw Right and left side views, We project object right and left side views on the vertical left and vertical right planes.
According to the rule of orthographic projection
The left plane is rotated towards the left side to bring the right-side view on a 2D plane. Therefore the Right Side View is projected on the left side of the front view, whereas the left side view is projected on the right side of the front view.
Third Angle Projection
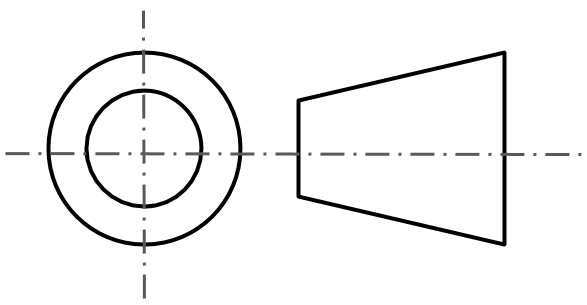
3rd angle projection is a type of orthogonal projection system where we place the object in the third quadrant, and the projection plane lies in-between the observer and the object. The third angle projection system is popular in United-State and Asian countries.
Drawing Front and Top View in 3rd Angle Projection
To draw front and top views in 3rd angle projection. We project the object front and top-view on vertical and horizontal planes.
According to the rule of projection
The horizontal plane is rotated in the clockwise direction. This rotation brings the top view to the top of the projected front view.
Drawing Right and Left Side View in 3rd Angle Projection
To draw the right and left side views on a 2D plane. We project the object right and left side view on the vertical-right and vertical-left planes.
According to the rule of projection:
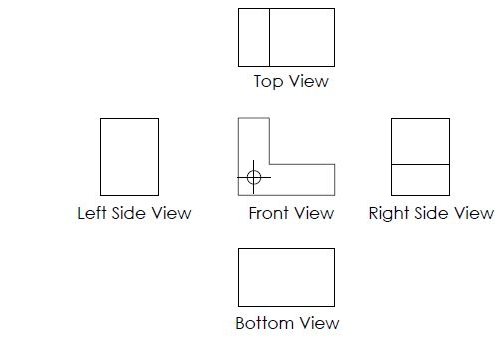
The right plane is unfolded towards the right side to draw the right side view on a 2D plane. Therefore Right side view is projected on the right side of the front-view.
Similarly, the left side view is projected on the left side of the front-view. The bottom-view is projected on the bottom plane and placed on the bottom of the front-view.
Importance of First Angle and Third Angle Projection System
Understanding engineering drawing incorrectly during part manufacturing can cause part rejection and financial losses because a part engineering drawing is drawn differently in the first angle and third angle projection system.
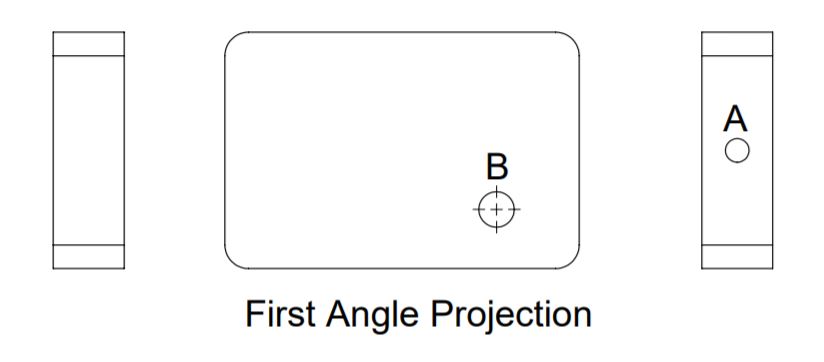
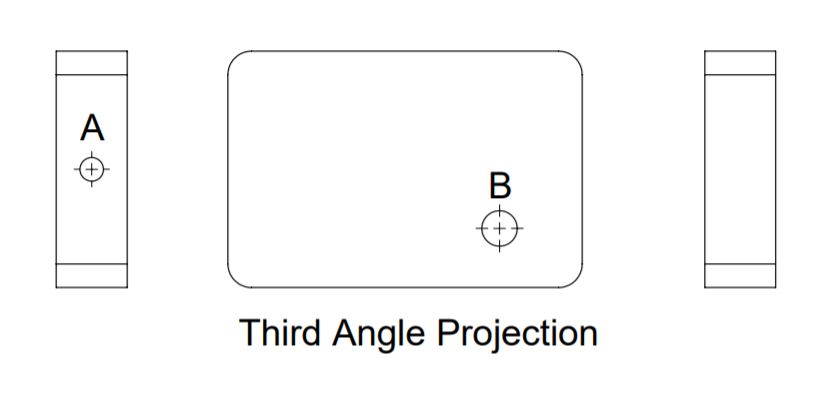
The above image shows a part drawing in the 1st and 3rd angle projection system.
Both drawings are different. We can not determine the position of hole-A w.r.t. hole-B without knowing the projection angle. In other words, if hole A is in the left or right of hole B without the knowledge of the projection system.
Difference Between First Angle and Third Angle Projection
The difference in 1st angle and third angle projection is in the way we place the object, and draw its views on a 2D plane. Here is the difference between the 1st angle and 3rd angle projection system.
1st Angle vs 3rd Angle Projection
| Parameter | First Angle Projection | Third Angle Projection |
|---|---|---|
| Symbol | 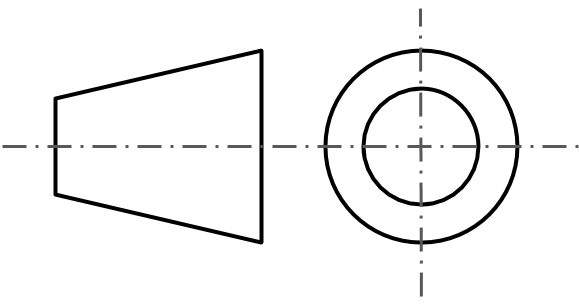 |  |
| Position | Object lies in first quadrant. | Object lies in 3rd quadrant. |
| Relative Position | Object lies in between observer and plane of projection. | Projection plane lies in between observer and Object. |
| Top View Position | Bottom of Front View | Top of Front View. |
| Bottom View Position | Top of Front View | Bottom of Front View. |
| Left Side View | Right Side of Front View | Left Side of Front View. |
| Right side view | Left side of front view | Right side of front View. |
To sum up, an orthographic projection system application is to draw a three-dimensional object in the 2D plane. In First angle projection, the object lies in-between the observer and projection plane. Whereas in the third angle projection, the projection plane lies in-between observer and object.
We will keep adding more updates and examples on the first angle and third angle projection system. Please add your suggestions, comments, or questions on the 1st angle and 3rd angle projection system in engineering drawings.

Add a Comment