What is Concentricity Tolerance in GD&T?
Concentricity tolerance in GD&T controls the central axis of a cylinder or sphere w.r.t. the datum plane or an axis. In other words, it ensures the median points of cylindrical parts are within limits.
For example, in transmission gears, Concentricity is used to ensure mating gear axis are concentric. Don’t miss this article on the basics of Geometric Dimension and Tolerance.
Concentricity Tolerance Representation

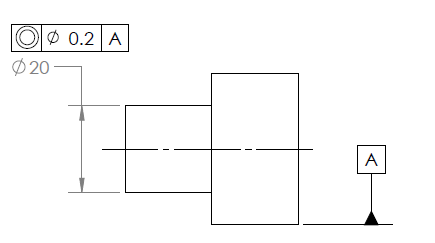
As shown in the above image, the stepped shaft’s larger diameter is a datum that controls the smaller diameter. In this way, we can control the diameter of the stepped shaft using concentricity tolerance.
- Datum planes, surfaces, or axis are required to define concentric tolerance.
- LMC and MMC modifiers are not applicable with concentric tolerance.
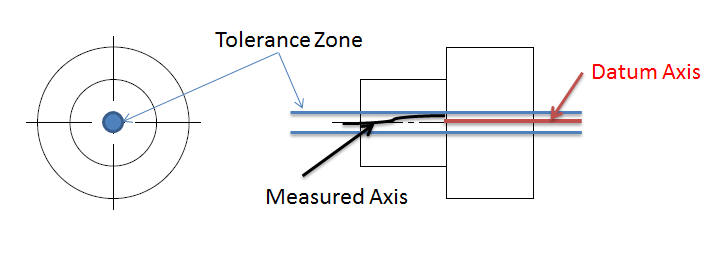
Tolerance Zone

Concentricity in gd&t creates a 3-dimensional cylindrical tolerance zone around the datum axis. All central points of the circular feature must lie in this tolerance zone.
Example
Runout and position tolerance are used as alternatives to concentricity tolerance because it is difficult to measure due to the involved steps. Therefore concentric tolerance is generally recommended for complex parts such as transmission gear and shafts or balancing equipment.
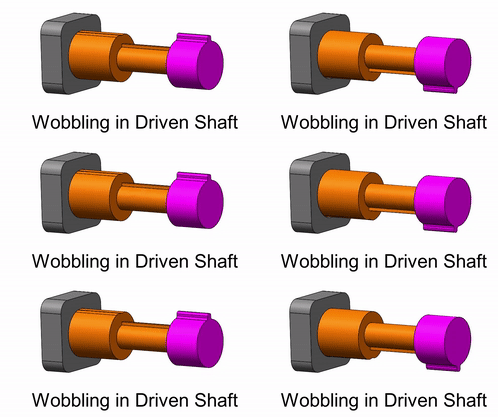
Let’s try to understand the impact when stepped transmission shafts are not concentric on one another.


As shown in the above image, concentric tolerance controls the dimensions of the stepped driving shaft. Non-concentric cylindrical features of the stepped shaft can cause wobbling in the driven shaft.
How To Measure Concentricity Tolerance?

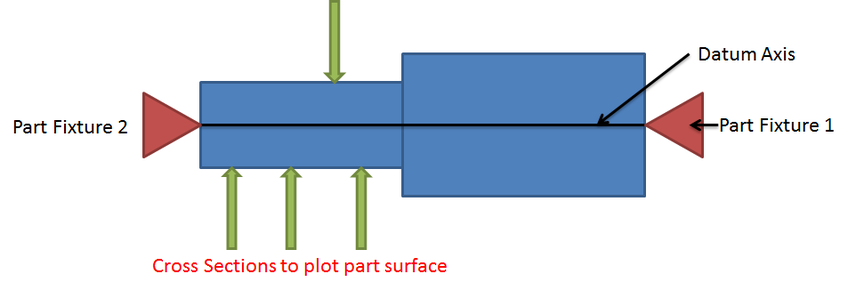
Step-1: Identify and fix the part on the datum plane/axis/surface.
Step-2: Plot the controlled surface outer profile using CMM or other measurement instruments.
Step-4: Determine the central points of the plotted profile at various cross-sections.
Step-5: Verify the position of central points. All points shall lie within the given cylindrical tolerance zone.
We will keep adding more information on concentricity in gd&t. Please add your comments, suggestions, or questions on Geometric Dimension and Control Tolerance in the comment box. Click this link to know various GD&T Symbols.

Add a Comment